Navigating the Labs
Let’s review how to navigate this website and the content provided.
Structure
The content of this workshop is made up of:
- Individual lab exercises
- Supporting content that explains concepts related to the labs
The lab exercises are designed in a way that you can run any modules as a self-contained exercise. Lab exercises will be displayed in the sidebar to the left and are designated by the LAB icon.
Opening the IDE
If you're at an AWS event, open the IDE from the Event Outputs section at the bottom of the Workshop Studio start page.
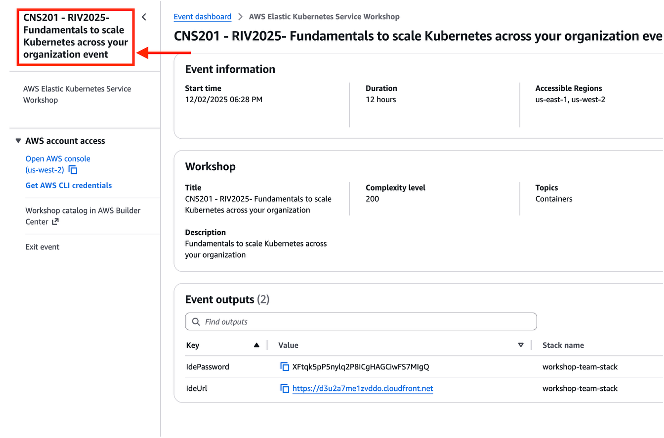
If you're running in your own account, find the IdeUrl in your CloudFormation stack's Outputs tab — see the setup guide for details.
Starting a Lab
Each lab has a "BEFORE YOU START" section with a prepare-environment command you need to run first. Always start from that page — jumping into the middle of a lab will cause unpredictable behavior.
Tips
Copy/Paste Permission
Depending on your browser, you may need to copy/paste content differently into the Code Server terminal.
- Google Chrome (Recommended)
- Firefox/Safari
The first time you try to paste content in the terminal, you will see a browser pop-up that looks like this:
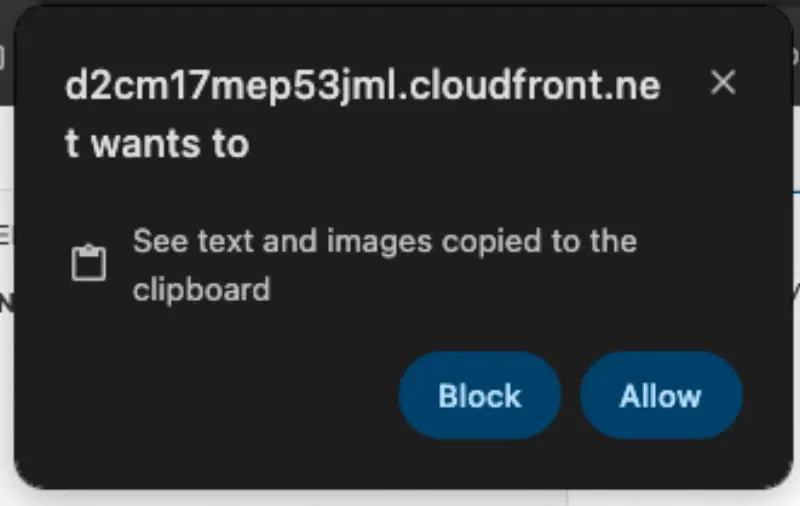
Click the Allow button to enable this functionality. After this, subsequent copy/paste will be straightforward. For this workshop, we recommend using Google Chrome if possible.
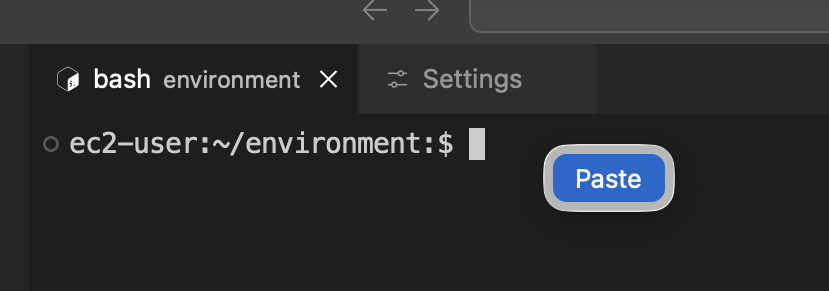
Every time you try to paste content in the terminal, you will see a small button as shown in the following screenshot adjacent to your mouse pointer. You will need to click on it to actually paste the copied content.
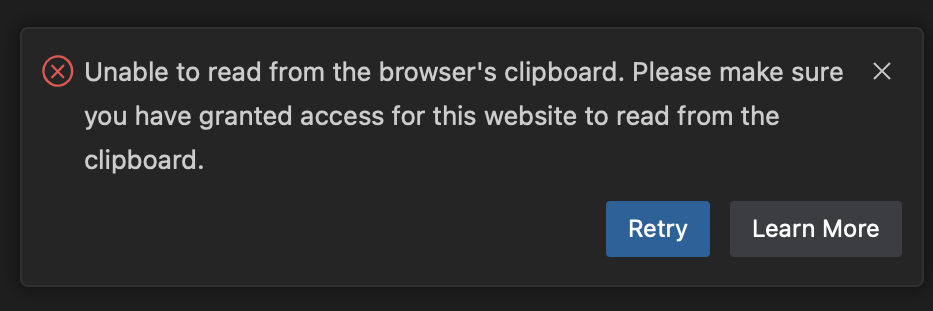
Additionally, you may also see the following pop-up box on the bottom-right corner of your editor window, which you may close and ignore.
Terminal commands
Most of the interaction you will do in this workshop will be done with terminal commands, which you can either manually type or copy/paste to the IDE terminal. You will see terminal commands displayed like this:
Hover your mouse over echo "This is an example command" and click to copy that command to your clipboard.
You will also come across commands with sample output like this:
Fri Aug 30 12:25:58 MDT 2024
Using the 'click to copy' function will only copy the command and ignore the sample output.
Another pattern used in the content is presenting several commands in a single terminal:
This is an example command
Fri Aug 30 12:26:58 MDT 2024
In this case you can either copy each command individually or copy all of the commands using the clipboard icon in the top right corner of the terminal window. Give it a shot!
Using Kustomize
Kustomize allows you to manage Kubernetes manifest files using declarative "kustomization" files. It provides the ability to express "base" manifests for your Kubernetes resources and then apply changes using composition, customization and easily making cross-cutting changes across many resources.
In this workshop, you will see the following two types of commands involving Kustomize.
-
kubectl kustomize some-deployment.yaml- This command generates the customized version of the yaml using Kustomize configuration. It does not deploy the resource. -
kubectl apply -k some-deployment.yaml- This command directly applies the customized version of the yaml using Kustomize configuration and deploys the resource.
You can learn more about Kustomize at https://kustomize.io/.
Next Steps
Now that you're familiar with the format of this workshop, head over to Getting Started.